¶ How do I log a call?
To initiate a support request follow any of the available channels
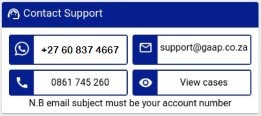
- WhatsApp to our support number +27 60 837 4667
- Reach out through Email to support@gaap.co.za
- GAAP National Call-Centre on 0861 745 260
- On the Point of Sale
1. Access the Springboard (☰) menu.
2. Choose System Support.
3. By clicking the View Cases button to review existing support cases or open a new one.
Unity Enterprise (Back Office)When creating a new ticket, remember to provide as much detailed information about the issues you are encountering. This will facilitate a more efficient resolution.
Reporting
How can I see my Sales real-time without needing to search through reports?
-
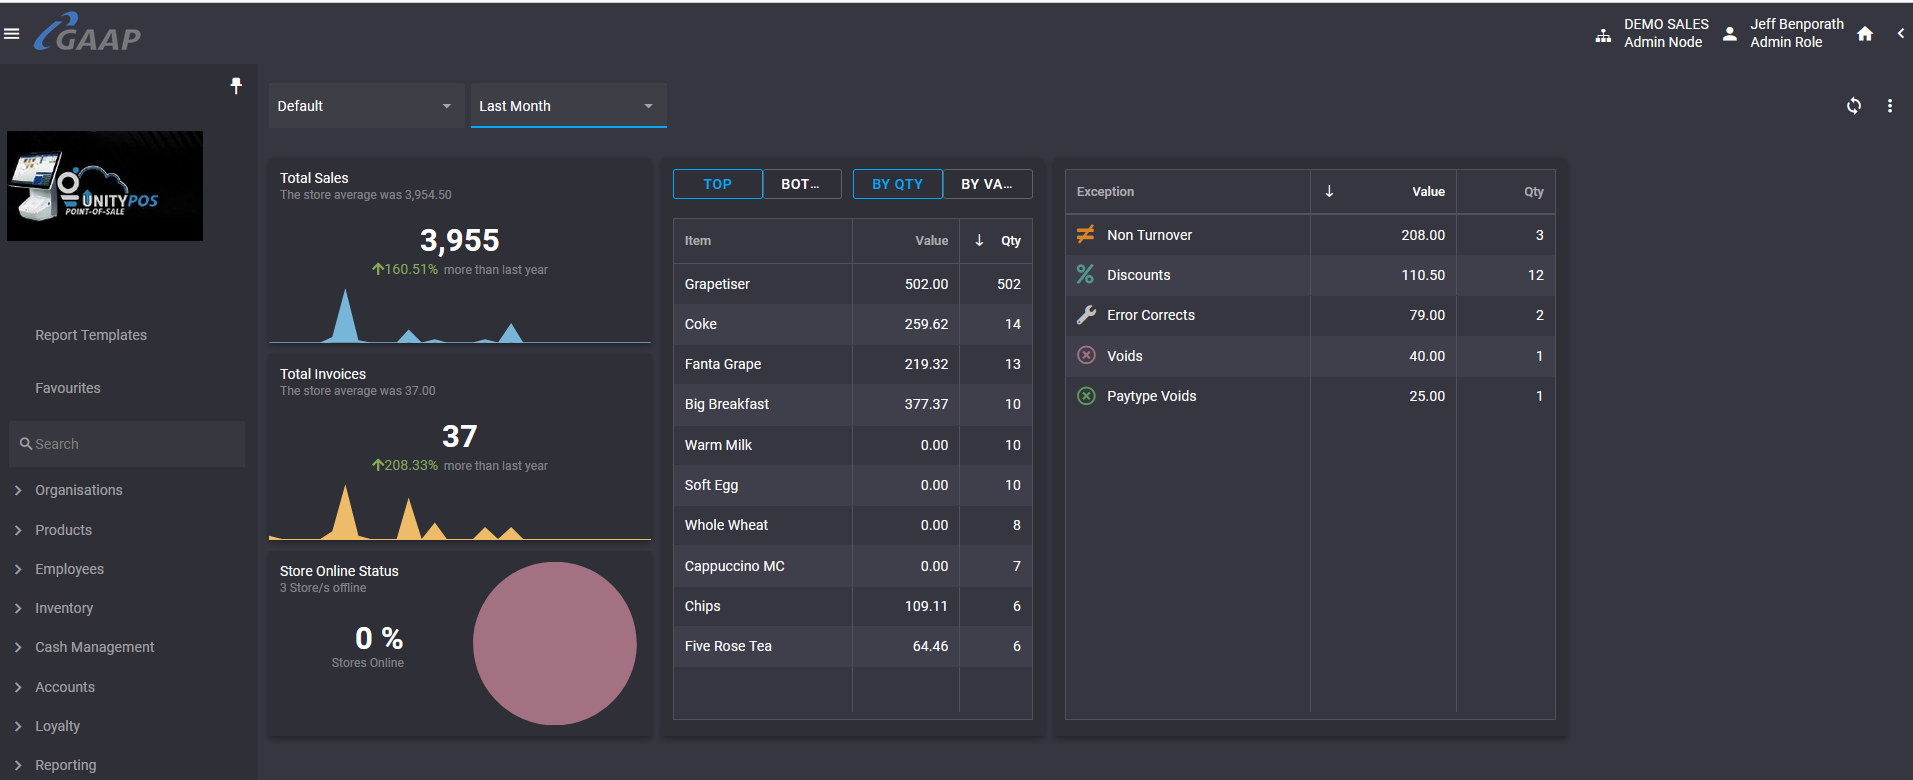
To view real-time sales data, you can access the Dashboard screen in Enterprise. This is also known as the landing page.
-
By default, you'll have access to relevant widgets, but if not, you can effortlessly customize your dashboard by adding the desired widgets from the menu.
-
Once you've added your chosen widgets to the dashboard, you can refresh your data every 2 minutes using the convenient refresh icon provided on the dashboard.
Click Here to see a short video on this
Why are none of my Sales uploading to Enterprise?
If your sales aren't uploading to the enterprise, confirm that your terminal is connected to the internet. Check for a green cloud icon on your primary terminal to indicate a connection to Enterprise. If it's not green, ensure all cables at the back of the terminals are securely seated. Alternatively, you can manually upload sales by logging into the springboard menu, navigating to **System Support**, and clicking the “Upload Sales” button. If the issue persists, please contact our support for further assistance.I am trying to find out what are my top and bottom sellers in my store are, where can I find this report?
- Access the Departmental Sales Report from the Reports List and select your Period, Department Groups, and Nodes needed for the Report and View the Report.
- Group the Grid generated by Product Name. In the Drop-Down Select Item next to the grouping, Select Product Name to Group the Grid by that Group.
- Select the Sold Qty column header to sort the grid by that column. This will display the items sold quantity from ascending or descending order to view the top and bottom selling items.
Click Here to see a short video on this
Is there a way I can view certain reports without having to go looking for them under the reports section?
You can bookmark reports as favourites for quick access. To achieve this, navigate to the report you want to view, then click on the star icon associated with the report. This will subsequently pin the report under your Favourites tab, there is also a Dashboard Widget available that can display all your favourite reports, facilitating convenient, quick navigation.Click Here to see a short video on this
Is there a Month end Procedure that needs to be done on Unity?
No, Unity does not require a Month end, the data is logically indexed by date.How do I generate a report?
- Go to Reports and choose the report you would like to view.
- Using the cards available, filter the report with the Period, Nodes, and Department Group.
- Select View Report or Download to download the report.
Click Here to see a short video on this
How can I add columns to my report?
- Select the Column Chooser icon, and select the column from the list on the column chooser.
- Click and drag the column to the required position in the report grid.
- The Columns can also be removed by click and drag from the grid to the column chooser box.
- The columns are also able to be moved left and right to customise the report.
Click Here to see a short video on this
How do I add Report Grouping?
Choose a column you would like to group by, click and drag it to the area above the report grid where it states Drag a column here to group by that column.
Click Here to see a short video on this
How do I Save a Template?
- Once the report columns and groupings are set up, select the Save as New Template icon or select the 3 dot menu and Save As New Template.
- This will bring up the Manage Template screen. Choose the Card/ Widget setup.
- Enter the Name of the Template.
- Set up the Widget/ Cards for Nodes, Period, and Departments
- For quick access to the Report Template setup, the pin this report to the Report Menu will add the report to the Favourites Report Menu, and the pin this report to the Dashboard will add the report template to the Dashboard Widget of the User.
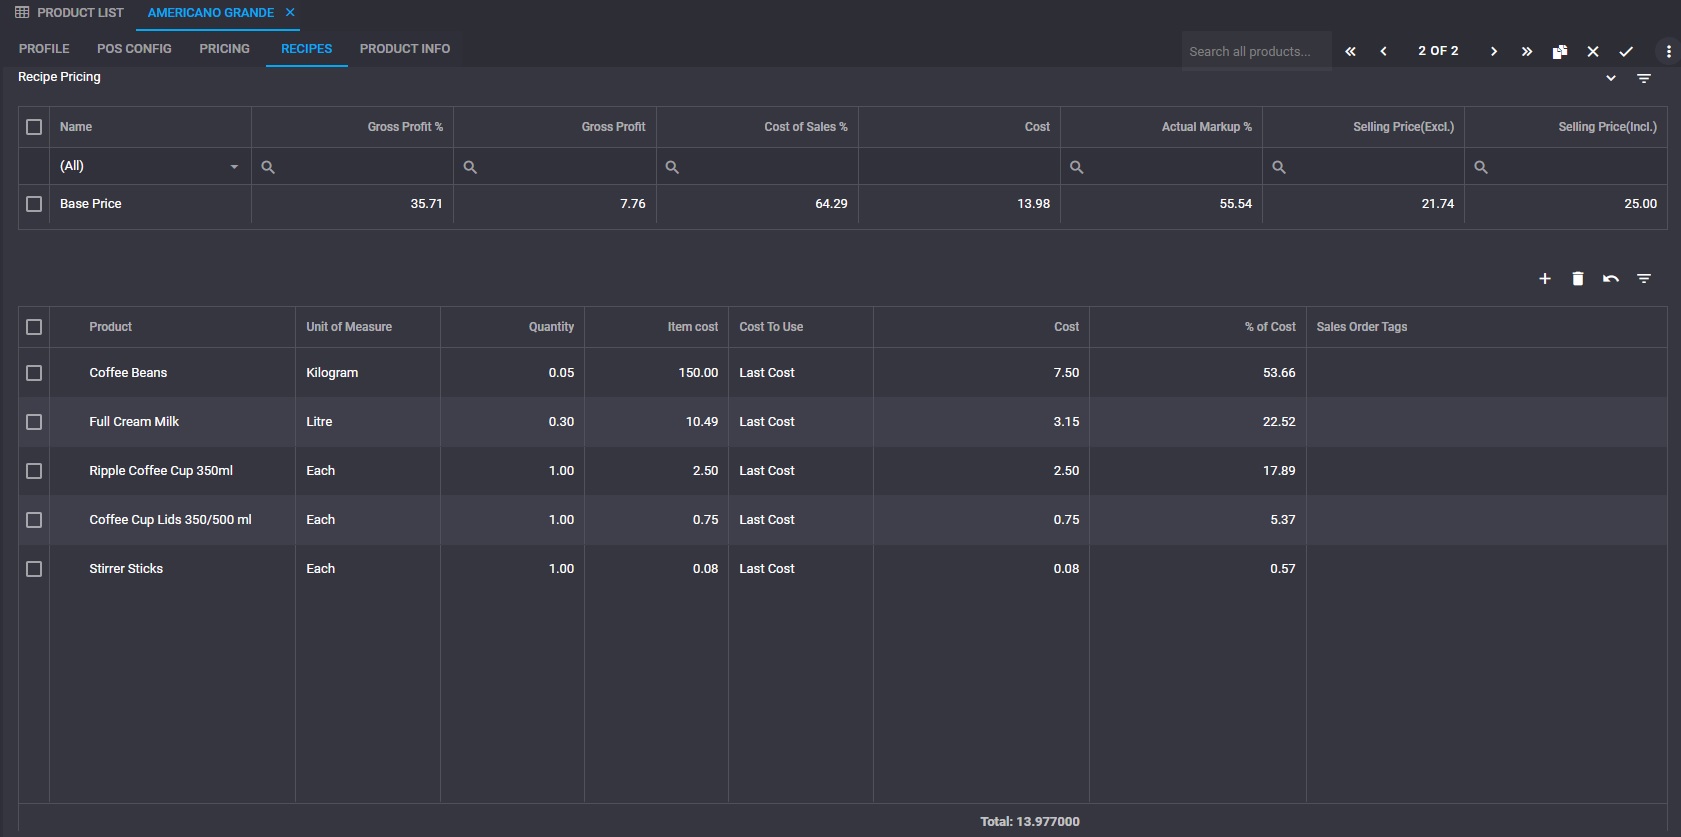
How do I configure a gross profit report?
To configure a gross profit report- Navigate to Reporting > Reports > Gross Profit Report, and select the filters for the stores and your period you wish to generate and select view report.
How do I determine what factors affect the gross profit?
Your gross profit is the difference in value between the selling price of an item and the cost of the ingredients and materials used to make said item (otherwise known as the cost of goods sold, or COGS). Please see below screenshot for more information.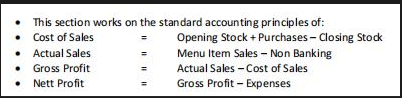
What is the difference between Theoretical Gross Profit and Actual Gross Profit?
Explaining the calculation and distinction between theoretical and actual gross profit¶ Theoretical and Actual Gross Profit
Theoretical and Actual Gross Profit Calculation
¶ Data Values
| Value | Description |
|---|---|
| Selling Price | The selling price of a single unit of a product |
| Sales Qty | The number of units sold of a product |
| Sales Value | The currency total value of the number of units sold of a product or mulitple products, less discounts |
| Cost Price | The cost price of a single unit of a product |
| Cost Value | The currency total vlaue of the number of units sold of a product or multiple products |
| Abbreviations | Description |
|---|---|
| SP | Selling Price if calculating for a single product, Sales Value if calculating for multiple products |
| CP | Cost Price if calculating for a single product, Cost Value if calculating for multiple products |
| GP | Gross Profit |
¶ Formulas
GP = (SP - CP)
GP% = GP / SP * 100
¶ Gross Profit Types
Theoretical Gross Profit is the gross profit the business would of generated if no discounts were applied. This value is important sinec it allows the business to see the impact of discounts on their profit.
The calculation is:
SP = Selling Price * Sales Qty
CP = Cost Price * Sales Qty
Theoretical GP% = (SP - CP) / SP * 100
Actual Gross Profit is the gross profit the business actually made, less discounts:
SP = Sales Value
CP = Cost Value
Theoretical GP% = (SP - CP) / SP * 100
How to see a report of all the voids or refunds on Enterprise?
-
Navigate to reporting > reports
-
In this page you will find “Sales Exception Reports”, click on this and fill in the location and date range as desired.
-
Alternatively, you are able to edit your Dashboard page with a widget of the POS Exceptions for a quick view of the report.
Click Here to see a short video on this
I am unable to view certain reports on Enterprise, who could I contact to get me access to these reports.
-
If you a manager apart of a franchise, you will need to contact your HQ for assistance to get access to those reports.
-
If you are the owner of the organisation, you by default will have all access to reports on enterprise.
Some of my items are not showing on Damage, GRV and stock; how do I make sure that all is correct?
- If a Franchise DB it needs to be escalated to HQ / Person who maintains DB.
- If Independent client then access Unity Enterprise. Navigate to Products - Manage Products and search for the Product in the Grid. Click on Pencil to Edit. Navigate to the Profile Tab and ensure the correct Inventory Tags are assigned (Inventory and Purchase)
I would like to pull a report that shows all the tips allocated per waiter
- To view a report showing all the tips allocated per waiter, first go to the reporting section and select the Sales Invoice Report.
- Filter the days as needed and sort the report out by employees
- Next, look for the Tips column. If you don't see it, click on the column chooser at the top right of the report. This will allow you to select and display the Tips column, showing all the tips added to orders for the selected period.
Cashup
Is there a way to quickly see if my store has been doing regular Store/Employee/Till cashups?
Yes, on Unity Enterprise, navigate to Cash Declaration, under Cash Management on the Springboard Menu, choose the Node (Branch) and the desired date range using the period selector to view all cash ups.Loyalty
How do I set up Loyalty Campaigns on Unity Enterprise?
- To set up Loyalty Campaigns, access the loyalty option in the Enterprise Springboard Menu and initiate the creation of a voucher.
- Click on the + icon, and complete the voucher details to design the desired reward for your loyal customers.
- To activate the campaign and allow customers to receive the voucher/reward, proceed to the Campaigns section under the Loyalty tab.
- Click on the + icon, follow the prompts to create the campaign, link the voucher to it, and specify the conditions for receiving the voucher.
How to create an open voucher campaign?
- Access the loyalty option in the Enterprise Springboard Menu and initiate the creation of a voucher.
- Click on the + icon, and complete the voucher details to design the desired reward for your loyal customers.
Stock Take
How do I create a Stock Sheet for my Stock Take
- Access Inventory Templates:**
- Navigate to Inventory > Inventory Templates.
- Create a New Stock Take Template:**
- Select Stock Takes.
- Click the + icon to initiate the creation of a new template.
- Complete Template Sections:**
Click Here to see a short video on this
Section 1 – General Settings:
-
Assign a Name to your stock template.
-
Specify Location and configure Variance Settings (Allowable Variances, Force Reasons, and Variance Report).
Section 2 – Products:
- Choose a Department Group to filter products.
- Tick the desired products from the left-hand block to include them in the template (they will appear in the right-hand block).
Section 3 – Grid Setup:
- Customize the stock take template by adjusting column order, adding/removing columns, and defining counting areas (e.g., Fridge 1, Fridge 2).
Section 4 – Permissions:
- Grant roles access to Customize and Finalize the template.
4. Save Template:
- Click Submit to save the freshly created stock sheet.
Click Here to see a short video on this
I am not sure how to add products to a stock take, how can I do this?
Navigate to Inventory > Inventory Templates.-
Edit Stock Take Template:
- Select Stock Takes.
- Click the cog icon (⚙️) on the relevant template.
-
Include Products:
- Click the Products icon (2).
- Find the desired product using the search feature.
- Tick the box next to the product to add it to the stock sheet.
-
Save and Refresh:
- Click Submit to save changes.
- Reopen your stock sheet to view the updated product list.
My stock is not deducting correctly and I am not sure where to look, where can I take a look at first to resolve this issue?
- Review any available Sales Reports to confirm if the product was sold. - If the product was sold, follow these steps to verify its recipe:- Access Product Editing:
- Go to the Manage Products grid.
- Find the product and click the blue pencil icon to edit.
- Review Recipe:
- Navigate to the Recipes Tab*
- Scrutinize the listed products and quantities in the recipe.
- Update Recipe (if needed):
- If incorrect products or quantities are found, make the necessary adjustments.
- Save Product Changes:
- Click the check; to save the updated product information.
Click Here to see a short video on this
Why is my Stock on Hand Quantity showing a Negative Value?
⚠️ Potential Cause of Inventory Discrepancy:
- Missing Closing Stock or Purchase Invoice:
- Ensure that a recent Closing Stock (Stock Take) has been recorded.
- Verify that all Purchase Invoices for the product have been accurately captured.
To Investigate Further :
- Generate Inventory Audit Report:
This report tracks each Inventory Action for the product in question, providing detailed insights into: - Stock adjustments
- Sales transactions
- Purchases
- Returns
- Any other inventory-related activities
Can I back date a Stock Take?
Yes by selecting the correct Shift (date) for the Stock Take when finalizing.Is it possible to edit a saved stock sheet?
Yes, by accessing the saved stock sheet, you are able to edit figures within the stock sheet.Is it possible to edit a finalized stock sheet?
Unfortunately not, once the stock sheet is finalized, you will need to redo the stock take if you require any figures to be amended
Purchases
How do I add a new Supplier?
- Log in to Enterprise.
- Navigate to Accounts and Select Suppliers from the dropdown.
- Click on the + icon at the top.
- You can add in all information that you want – Ensure you complete all the required info (indicated with the Red Exclamation Icon ❗️).
- Once done click on the ✓.
Click Here to see a short video on this
How do I delete / correct a Purchase Invoice that was captured incorrectly?
- Log into Enterprise.
- Navigate to Inventory and select Purchase Orders.
- Once on the grid, select the 3 dots in the right-hand corner.
- Choose the View Recorded Invoices option.
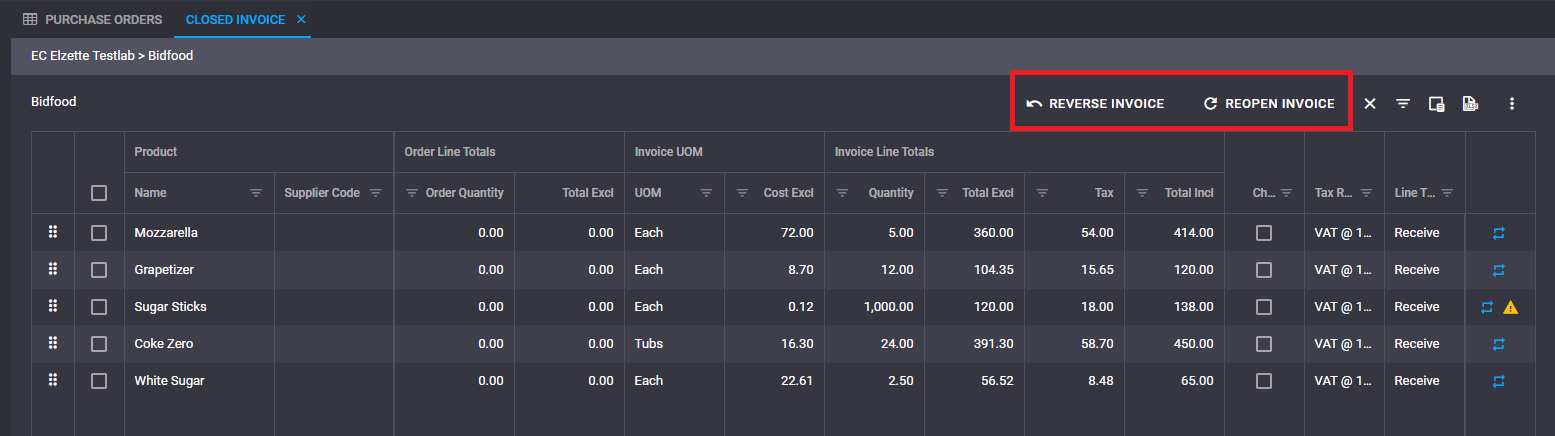
- Click on the Purchase Invoice applicable.
- This will then open the Invoice and on the top you have the option to either Reverse Invoice (Delete) or Reopen Invoice (Correct).
Click Here to see a short video on this
How do I view the VAT column while in the Purchase Invoice?
On your Purchase Invoice grid there is a column available called Tax Rate that allows you to toggle between VAT or No VAT.
- If you are not able to access it navigate to the Column Chooser Icon and drag it onto your grid.
- If the Tax Rate on the product is incorrect then you can adjust the Purchase Tax on the product itself.
Click Here to see a short video on this
I see a small Yellow Triangle on my Purchase Invoice screen
This is a new feature that alerts you that your captured Cost Price is above or below your Allowable Cost Variance.Maintaining Products
Some of my inventory items are missing on my templates, how can I make sure all my items are accounted for?
1. Verify Inventory Product Group:
-
Navigate to Manage Products.
-
Locate the product and click the blue pencil icon to edit.
-
Under the Profile tab:
-
Check that it is assigned to the correct Inventory Product Group linked to your stock sheet.
2. Check Inventory Tag:
-
In the Product Types section:
-
Verify that the Inventory Tag is marked for the product.
3. Save Changes:
-
Click on the checkmark (✓) to save the product and apply the changes.
How do I add a Recipe to a Sales Item
Navigate to the Manage Product grid.
-
Locate the desired product and click on the blue pencil icon to enter edit mode.
-
Click on the Recipes Tab to view and manage product recipes.
-
Click on the plus icon (+) to add ingredients to the recipe.
-
Search the required product in the name column and select from the drop-down list.
-
Enter the quantity of the ingredient, paying attention to the Unit of Measure.
-
Monitor the Cost field to ensure accurate Cost Price and Quantity information.
-
Click on the checkmark (✓) to save the product and its updated recipe.
Example of completed Recipe:
Click Here to see a short video on this
How can I add the Recipe Tab on a Sales Item
- Click on the Profile Tab of the selected product.
- Under Product Type: POS, ensure that Sales Item is selected.
- Once Sales Item is selected, the Recipe Tab will appear at the top of the Product Screen.
- Click on the checkmark (✓) to save the settings.
Click Here to see a short video on this
Maintaining The Point of Sale
How do I link Preparation items to my Sales Products?
- To associate a preparation item with your product, begin by creating the preparation message under the Products - Preparation Messages tab.
- Once you've ensured that your preparation messages are correctly configured, access your product through Manage Products.
- Navigate to your POS Config, and within the Preparation Messages section, choose the specific the Preparation Message you want to associate with your item.
I need to change some permissions for my staff, how can I modify these security details?
- To modify security settings for your staff, go to the Employee's menu in Enterprise and choose the Designations option.
- Within these designations, you can customize permissions for each relevant designation.
- To assign specific designations to individual staff members, proceed to the Manage Employees option in the menu, select the desired staff member for editing, and assign designations by clicking on the corresponding column and adding the relevant designation.
Click Here to see a short video on this
I would like to set up promotions for my customers, where can I set these up?
- To set up promotions and discounts for your products, go to the Promotions & Discounts option in the Products menu.
- Click the + icon and follow the prompts under Promotions & Discounts Details.
- Be sure to choose the appropriate Conditions for your products and specify the desired Action for applying promotions and discounts.
Click Here to see a short video on this
I am getting new staff and I am wanting to add more cashiers via Enterprise. How do I create more employees?
-
Navigate to Employees> Manage Employees in Enterprise.
-
Click on the + Icon in the top right-hand corner and fill in your Employees details and designations as desired
I am getting new Managers that needs access to Enterprise. How do I add new users to Enterprise?
-
Navigate to Organisations > Users
-
Click on the + Icon on the top right-hand corner to create new user
My cash and card amounts are not balancing between my POS and Enterprise, is there a way I can get them to balance correctly?
-
If the figures are not corresponding between your POS and Enterprise, this is usually caused by your data that has not yet synced to your terminal.
-
On your POS, click on the springboard menu and go to system support.
-
Click on the upload sales button and this will sync your data to enterprise. If there are any error messages, first check your internet connection to see if it is stable, else contact our Support team.
Click Here to see a short video on this
General
I forgot my Enterprise password, how can I reset it?
On the login page, click on the forgot password link, which will prompt you for your email address.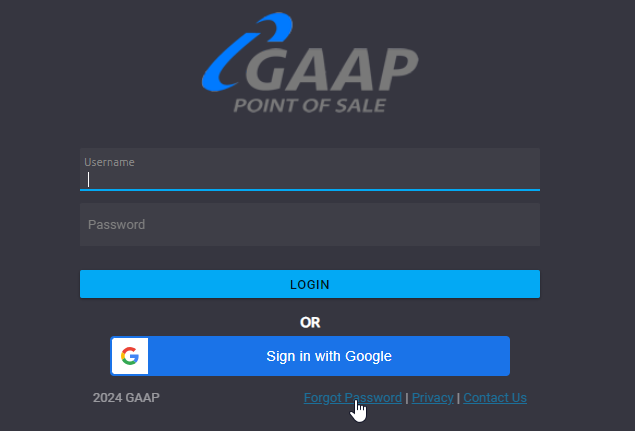
- Once you submit your email address, you will receive a link via that email to reset your password
How do I set up Departments?
To set up departments in Unity Enterprise (Back Office)- Navigate to the Springboard Menu > Products > Department Groups
- In the Department Groups, click on the + Icon to first create a Department Group > Name this accordingly
- Once your Department Group has been created, under the Department Group Details, click on the + Icon under this section to add your Departments. You are also able to add sub departments within these departments.
Where can I set up multiple currencies (Forex) for the store?
-
Navigate to the Springboard Menu > Organisations > Nodes > Settings > Forex
-
To add a currency, click the + icon, which will prompt you to select a new currency
Where can I find Kiosks setup details?
- Navigate to the Springboard Menu > Organisations > Nodes > Settings > Kiosk Settings
I am not sure if my stores are online or not, where can I check this?
Under your Enterprise Dashboard (Home button on top right-hand corner) You are able to see your stores Online Status on the default home page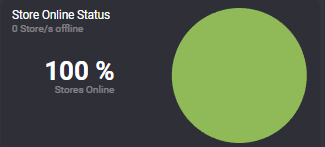
I need to set up commission for my staff, where can I do this in Enterprise?
- Navigate to the Springboard menu in Enterprise > Employees > Earnings & Deductions
- Click the + icon and fill in the details as necessary
How to fix WiCode settings and other 3rd-party integrations
If you encounter issues with the WiCode being generated or any other 3rd-party integrations, it's typically due to merchant changes within your organization.
- Navigate to Springboard > Organizations > Nodes > Manage Nodes.
- Select the store with the integration and click on the Pencil Icon to edit the details.
- Click on the Integrations tab at the top of the page to access your WiGroup settings and other 3rd-party integration settings.
One of my employees has forgotten their password to log into the till. How do I retrieve or reset their cashier code?
-
Navigate to Employees> Manage Employees in Enterprise.
-
Look for the employee and click on the pencil icon to view the employee details, and their password will be displayed on this page.
My Enterprise is unable to open on Google. Is there any steps I can take to resolve this issue?
The most common issue with Enterprise not opening is usually due to the cache on your browser that will need to be cleared. Navigate to the settings in your browser and the option for clearing your cache will be present.
Alternatively, a refresh of the page would also resolve the issue
I would like to set up promotions and discounts on items but also have it for specific days, how can I do this on Unity Enterprise?
- Start by creating an availability template. You can find this option under Organisations > Availability Template.
- To set up the availability template, click the + icon, then fill in your details and conditions as needed..
- Go to Promotions & Discounts and click the + icon to add a new special.
- Give your special a name, then assign a condition to specify which items are part of the special. After that, select the availability template you created to apply the special's timing and availability.